THE PROJECT
1. Determine the maximum height and right-to-left placement of the new showerhead, and then mark the wall with a pencil.
2. Using the kit’s mounting bracket, mark your drill holes at the location you have chosen.

3. Measure the bar length down from the top bracket and mark the spot for the bottom bracket—use a level to make sure it’s plumb (or a true vertical). Mark the drill holes. (The instructions may give a definitive length to drill the holes. If not, measure the distance of the assembled bar.)

4. Score the hole marks with a nail punch and hammer to create a starting point for the drill bit. (See “Drilling Tips for Tile”.)
5. Drill the holes for your mounting bracket. The kit will indicate the drill bit size.

6 Insert the anchors into the holes. Put a bead of silicone caulking around the back of the mounting brackets and screw them into the anchors.
7. Assemble the slide bar. This will usually involve attaching the shower holder to the bar and a bracket cover on to each end. Make sure that the shower holder slides properly up and down the bar.
8. Put a bead of silicone caulking around the back of each bracket cover.

9. Secure the assembled bar to the mounting brackets. Typically, there will be a set-screw on each bracket cover that will screw onto the mounting brackets with an Allen wrench or screwdriver.
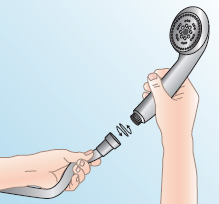
10. Screw the shower hose to the shower arm, and then the handheld shower to the hose. Many kits call for hand-tightening.
11. Turn on the water to check for leaks.
12. Place your new handheld shower on the bar and admire your work. Allow the silicone to dry before using the shower.

No comments:
Post a Comment